The Eclipse Development Environment is easily configured to use the Alta distribution Windows DLL and .lib files.
Here’s an example of how we did it:
1) Create your C or C++ project in Eclipse using the Visual C++ toolchain or toolchain you normally use.
For this discussion, we will use project named ADT_Test.
2) Import the following files into you project workspace (workspace/ADT_Test) using the import->file system Eclipse tab.
ADT_L0.h
ADT_L1.h
ADT_L0.lib
ADT_L0.dll
ADT_L1.lib
ADT_L1.dll
ADT_L1_1553_ex_BIT.c (or other Alta example source, or your own main source)
Note: There was some confusion encountered when we had spaces in our workspace pathnames, so our workspace was created at the top-level root drive (C:) folder.
3) Verify that your project now looks something like:

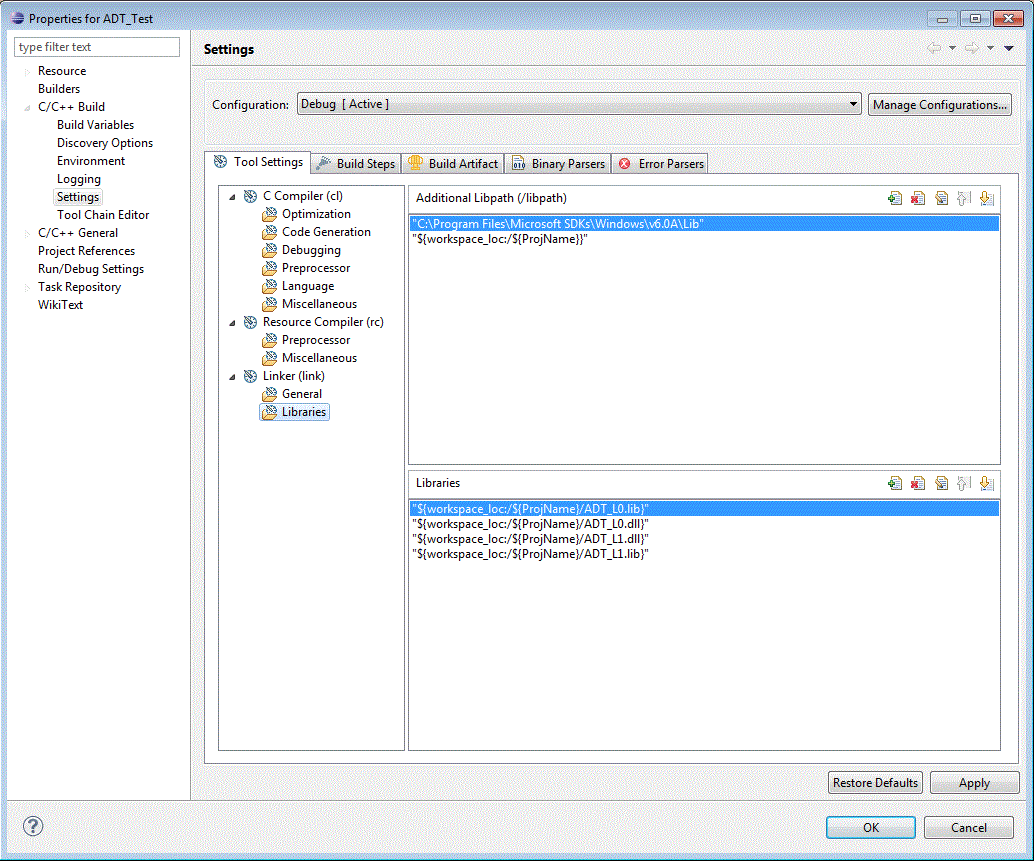
4) Modify the Project Properties by right-clicking on the Project name (ADT_Test) and choosing Properties. Add the dll and lib filenames:
5) Copy the ADT_L0.dll and ADT_L1.dll files to either or both target directories, Debug and/or Release.
6) Build and run your program!
